
- From our Sponsors -
Perhaps you have completed the courses like PHP with Laravel for beginners — Become a Master in Laravel or Laravel From Scratch. You’ve learned the basics of Laravel.
Now what?
You want to build something bigger than a basic CRUD app.
Let’s say building a blog. You’ve learned how to create a post, update it, and delete it. Now you want to know how to build the user account, who can create a post that available to other users who want to view it. You want to know what’s the best practices with the naming conventions for routes.
I am going to cover those topics in this Rebuild Twitter with Laravel.
Follow along and together we’ll build an interesting app, at the same time, develop your skills and be ready to change the world.
Here is what we are going to do.
We’ll rebuild the famous social network, Twitter from scratch. Please bear in mind that this is a project for learning, the outcome is not exactly same as the actual Twitter website. We are learning by rebuilding the key features in our own way.
These are the key features of the Twitter that we are going to rebuild,
We’ll focus on the backend code and its underlying theory, instead of front-end UI.
Let’s start with the user and authentication.
Twitter requires your name, email address and password in order to create an account. Additionally, Twitter allows you to enter your phone number and choose a username.

Register as Twitter user
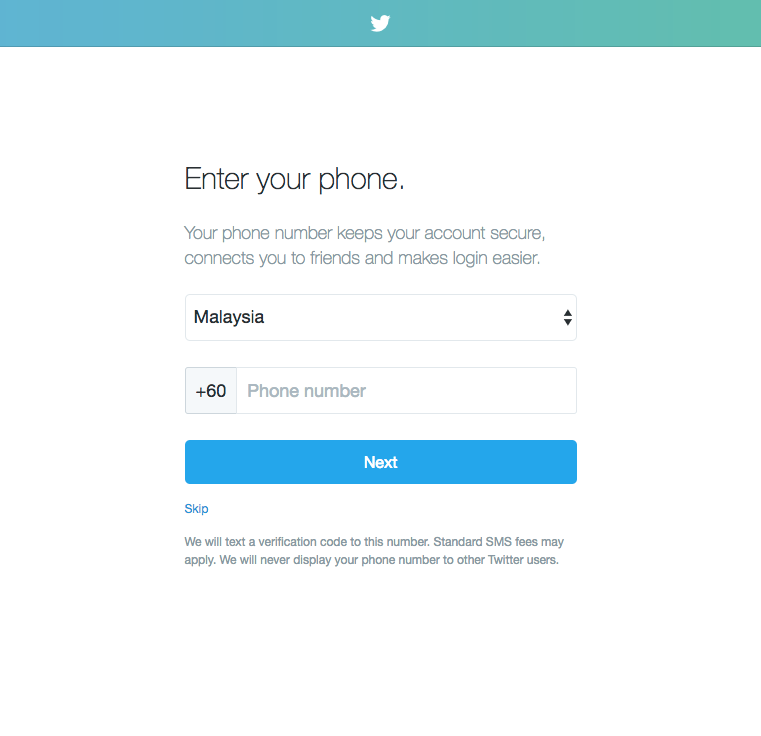
Enter your phone number to enable login with phone number.

Choose your preferable username.
Twitter accepts both email address, phone number and username as part of the login credential.

Twitter allows you to login with phone number, email address, or username.
In this case, you are going to implement the login method with email address and username only.
These are the pages you’ll be develop,
In technical, Laravel released a useful scaffolding feature during version 5.2.
https://laravel.com/docs/5.2/releases#laravel-5.2
php artisan make:auth
The command provides a quick way to scaffold the authentication views for your front-end and backend as well.
Alright, let’s summarize your planning
After you execute the make:auth command, views create for login and register, routes configure, and controllers and middlewares add for authentication. Your app immediately ready for user register and perform login.
First step, you install a new Laravel project.
composer create-project --prefer-dist laravel/laravel laratweet
Install via composer create-project is my favourite. You can proceed with your preferable method. (Laravel Installation)
Welcome page
Then, execute the make:auth command.
php artisan make:auth
Authentication scaffolding generated successfully.

Welcome page with authentication enabled
By default, Laravel comes with 2 database migration files, create_users_table and create_password_resets_table.
The preset users table contains the basic information of user. You need one more field to store username.
Username and email are essential for login. There is no two user are allowed to have same username or email address, so these two fields must be unique.
Schema::create(‘users’, function (Blueprint $table) {
$table->increments(‘id’);
$table->string(’name’);
$table->string(‘username’, 15)->unique();
$table->string(‘email’)->unique();
$table->string(‘password’);
$table->rememberToken();
$table->timestamps();
});
Then, execute the migration command.
php artisan migrate
Migration table created successfully.
Migrated: 2014_10_12_000000_create_users_table
Migrated: 2014_10_12_100000_create_password_resets_table
Next, allow user to register.
Username is newly introduced in the User table. Now you need to introduce it to the model.
protected $fillable = [
'name', 'username', 'email', 'password',
];
Next is RegisterController. In RegisterController, you add username into the create() and define username rules in validator(). As you can see the code below, both email and username are unique in the user table.
protected function validator(array $data)
{
return Validator::make($data, [
'name' => 'required|max:255',
'username' => 'required|max:15|unique:users',
'email' => 'required|email|max:255|unique:users',
'password' => 'required|min:6|confirmed',
]);
}
protected function create(array $data)
{
return User::create([
'name' => $data['name'],
'username' => $data['username'],
'email' => $data['email'],
'password' => bcrypt($data['password']),
]);
}
Then, add the username onto the Register form. You can refer the view file from here.
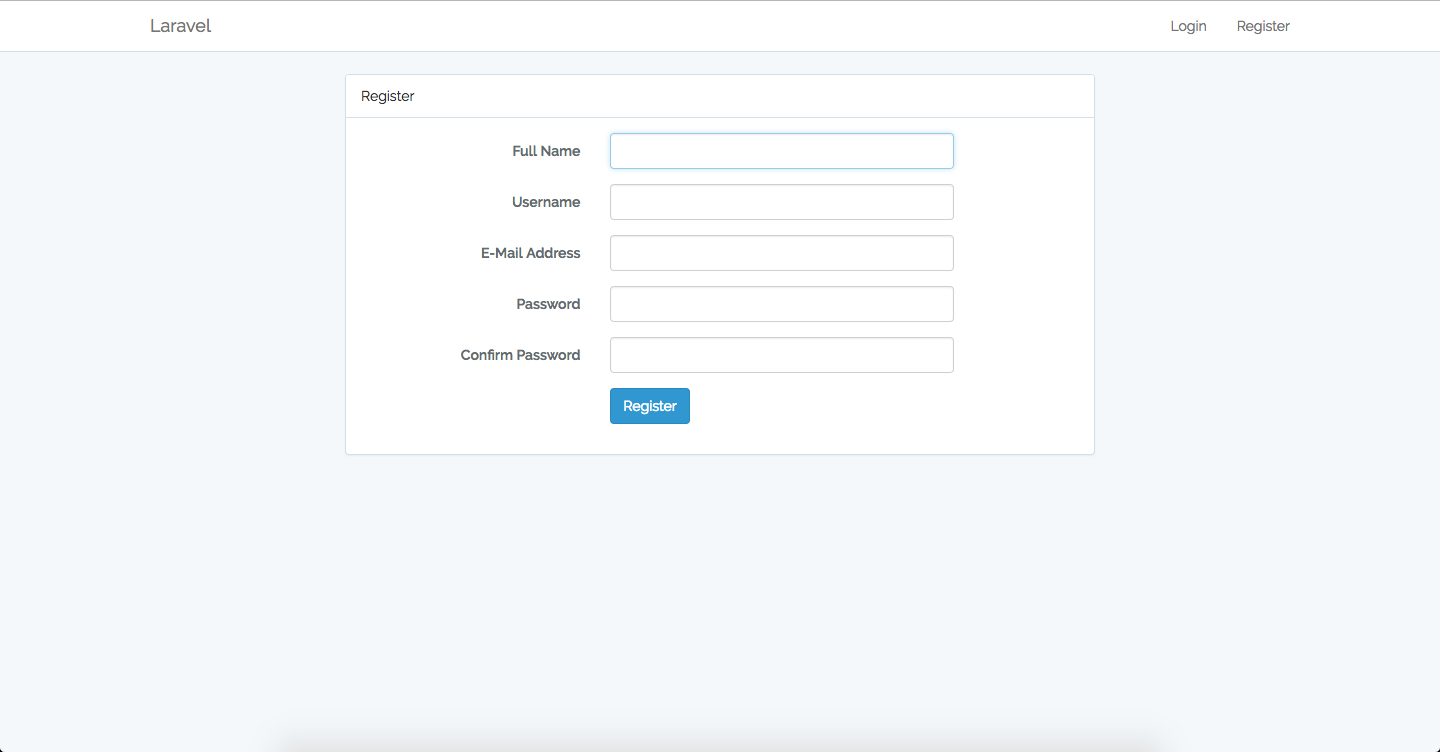
Register page
In the create(), by default, the password is hashing by bcrypt(). This is an important part in your User authentication. This is how you protect your user. By hashing the password, even the hackers have your database access, they will not know the actual password.
These two articles clearly telling you how does hashing works and how important it is.
Now, you can register as an user and login with registered email address.

Login page

Home page
Alright, now you can login with email. How about the username?
This is the hard part. In common login feature, you are allowed to login with either username or email address, or there are 2 forms or 2 fields to separate the login methods. At this time, you’ll be challenged to be able to login with username or email with the same field.
Laravel Authentication Scaffolding provides the codes to perform normal login. Now you’re going to study deeper to enhance it.
Some people will try to hack it by writing shortcut codes in order to achieve their goals.
Some people rewrite their own method to fulfil the requirement.
You are not going to do that. You want to do it in a proper way.
Let’s dig deep into the Laravel Authentication feature.
When user clicks the login button, a request sends to the /login which LoginController inherited from AuthenticatesUsers.
How does your system know it is using the email as login?
As you can see it below
public function login(Request $request)
{
$this->validateLogin($request);
// If the class is using the ThrottlesLogins trait, we can automatically throttle
// the login attempts for this application. We'll key this by the username and
// the IP address of the client making these requests into this application.
if ($this->hasTooManyLoginAttempts($request)) {
$this->fireLockoutEvent($request);
return $this->sendLockoutResponse($request);
}
if ($this->attemptLogin($request)) {
return $this->sendLoginResponse($request);
}
// If the login attempt was unsuccessful we will increment the number of attempts
// to login and redirect the user back to the login form. Of course, when this
// user surpasses their maximum number of attempts they will get locked out.
$this->incrementLoginAttempts($request);
return $this->sendFailedLoginResponse($request);
}
protected function attemptLogin(Request $request)
{
return $this->guard()->attempt(
$this->credentials($request), $request->has('remember')
);
}
protected function credentials(Request $request)
{
return $request->only($this->username(), 'password');
}
public function username()
{
return 'email';
}
login > attemptLogin > credentials > username
username() returns the name of the request parameter, at the same time, it is the field to lookup in the database table to verify the login attempt.
How do you determine to use either email or username?
You can verify its format. If the input is in email format, check with email field, otherwise, check with username field.
$login = $request->input(‘login');
// Do a check on the input whether it matches the email format
$field = filter_var($login, FILTER_VALIDATE_EMAIL) ? 'email' : 'username’;
The next question is where do you place this logic?
At this point, the way I can think of are,
In this case, the latter is more proper and reasonable.
In considering of the ThrottlesLogins trait is using username() to record the login attempt. You’ll need to think another way round. The username() is very essential to this security feature. The second way is more proper. It leave the logic of determination right before reading from database, it won’t break anything.
use IlluminateHttpRequest;
...
protected function credentials(Request $request)
{
$login = $request->input($this->username());
// Do a check on the input whether it matches the email format
$field = filter_var($login, FILTER_VALIDATE_EMAIL) ? 'email' : 'username';
return [
$field => $login,
'password' => $request->input(‘password’)
];
}
public function username()
{
return 'login';
}
Lastly, change the email field in the Login form to be login and make a small change on the inputs. You can refer the view file here.
Now you can login with either username or email. Test it out!

New login page
Home page
The most challenging part of building user profile is the planning, not the code. As mentioned in the post, what do you store in user table, how to secure user information, and how to provide a rich user experience are the key questions on planning for user profile.
This guide gives you a brief introduction on the key items you should take care and they are pretty much sufficient to implement on simple real life application.
Feel free to leave your response below or send me an email at sky@iteachyouhowtocode.com
There are three things you can do
- From our Sponsors -


